BOLTS BREAKING

CATEGORY: FRAME & SUSPENSION COMPONENTS & TIRES

TOPIC: BOLTS BREAKING
Posted: 4-3-18
Posted By:  DandK-Travelers

See Forum Post HERE
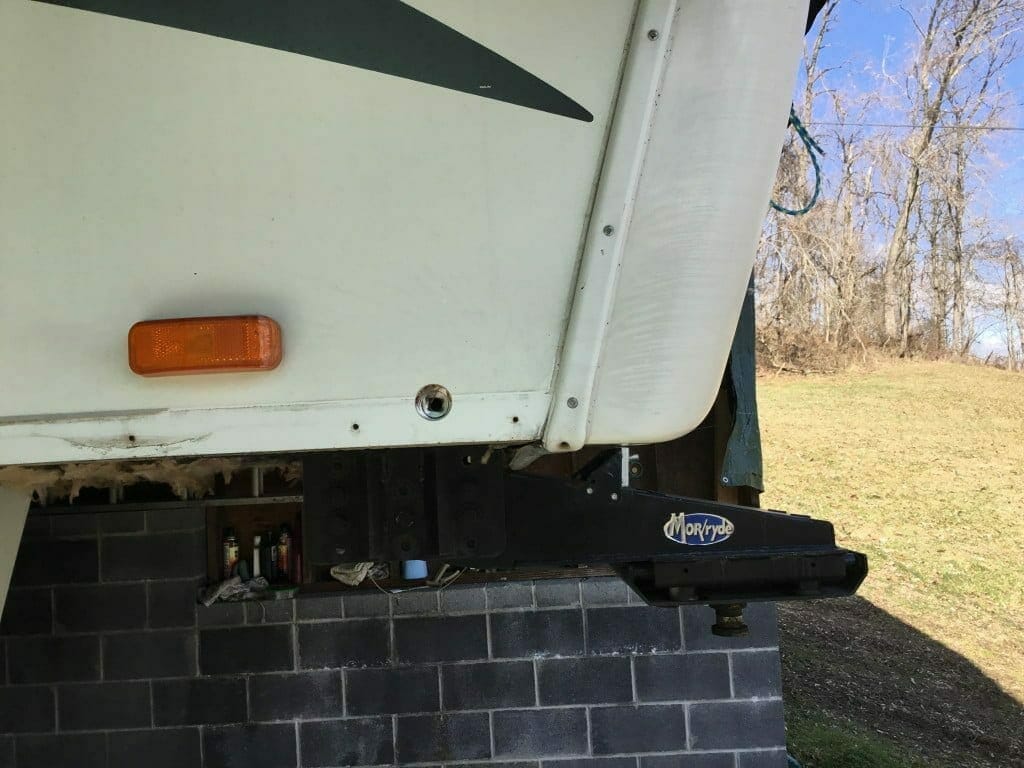
After reading a couple of threads here about the bolts under the front by the hitch, that secures the steel frame to the aluminum side wall, I found the two front bolts on each side broken.  All others were fine.  I purchase the new bolts from Fastenal.  I purchased 3/8” x 4 1/2” grade 5 full thread round head shaker screen bolt.  I wanted to buy partial thread but couldn’t find them.  Hopefully, the grade 5 bolts won’t break.  No broken welds either.

I had heard some creeping/cracking +when I loaded and unloaded the 5th wheel.  I removed all the sheet metal, I’ll send a picture later this morning.  I’d say it took about 1 hour to remove the sheet metal for access.  You do have to remove all 3 pieces to gain access.  I’ll just fill the hole with white caulk.  The molding will cover most of it.

Guess you can’t see the 4th hole.  It’s on the right.  Once you remove the sheet metal, try and tighten the bolts and you’ll find out if any are broken.

Mine did have fiberglass insulation.  I removed it and installed the bubble insulation.  I installed two layers making it R12 and no uninsulated areas.

“Alloy reply”: You are better off stuffing the cavities with fiberglass or Roxul insulation. 
Foil-faced bubble wrap is only R1 when use to reduce convection.
Foil-faced bubble wrap can be more than R1 when it is used in a roof or South facing the wall to reflect the IR (infrared) rays from the sun. A metal roof will do the same.
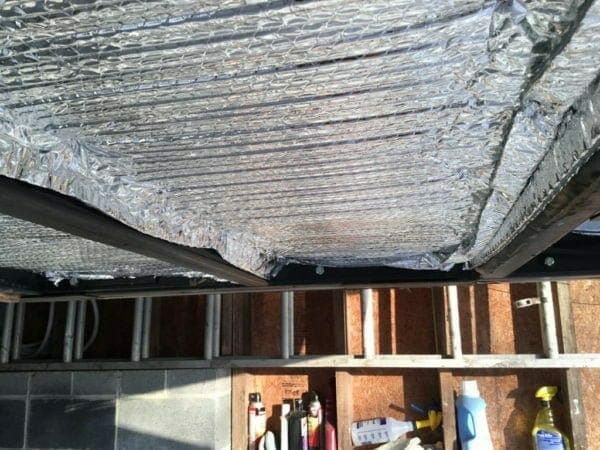
You can see in the picture 3 nuts and a 4th hole on the right.  I removed this bolt and am waiting for delivery today the new bolts.
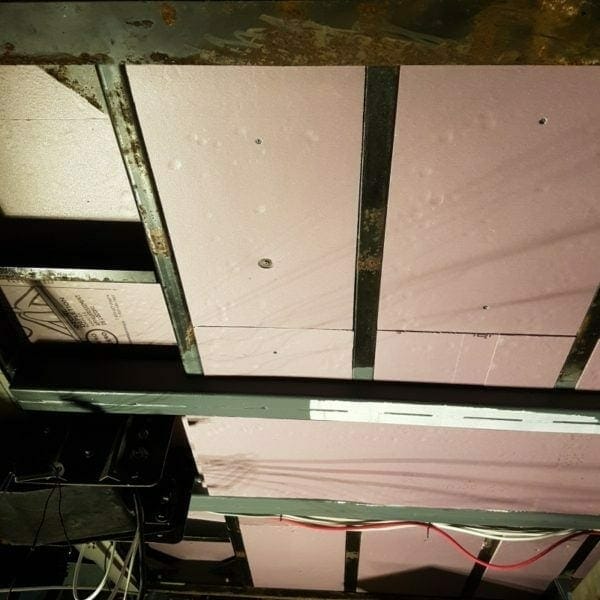
The XPS insulation under the front bunk area of our Cameo.

The steel tube (four -2″ x 4″) on each side of the pin box is not original.

The red wire will carry a 100amps from the truck to the trailer batteries.

GOODYEAR COMES THRU

CATEGORY: FRAME & SUSPENSION COMPONENTS & TIRES

TOPIC: G114 TREAD SEPARATION
Posted: 04-18-18
Posted By:  retiredfields

See Forum Post HERE

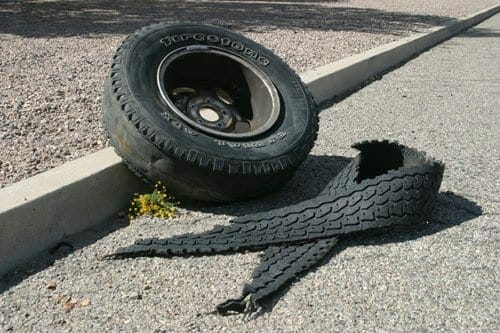
Photo is example only

The tires are less than 2 years old. Probably about 10k-15k miles. The other three still have 15/32 of tread left, they don’t look at all worn.

The easiest way to look for tread separation is to raise the tire off the ground and spin it by hand. Look for any out of round or bulge areas on the tread. The separation starts at one area of the tread and then progresses around the tire until it finally let go. When I was lubing my shackles last month, I noticed an odd looking area on that tire tread, but unfortunately, I forgot about it and did not examine further. 300 miles later, it let go. 

This is a G114 H rated tire. The Goodyear dealer seemed to imply they had regular issues with these tires. 

Read more

REPLACING OLD FADED & CRACKED RV GRAPHICS

CATEGORY: ON THE OUTSIDE

TOPIC: ARTiCLE IN TRAILER LIFE MAGAZINE ON REPLACING GRAPHICS/STRIPES (DECALS)
Posted: 04-18-18
Posted By: Papere

See Forum Post HERE


Changing an RV’s Stripes


VIP Enterprises’ complete RV-graphic replacement breathes new life into timeworn vinyl decals

The majority of RV owners take pride in the appearance of their rigs and let’s admit it, most of us want others to take notice. Prior to an outing, many owners dedicate a weekend or two for a complete wash and wax to make the RV shine, but no matter how hard they work at keeping the exterior pristine, Filon siding and vinyl graphics begin to fade and crack from years of environmental stress. Most vinyl graphics time out after six or seven years, and even with the best maintenance plan, the sun takes its toll. The Filon siding can be waxed or polished to attain a new look, but the vinyl cannot be brought back to life after fading and cracking begins.

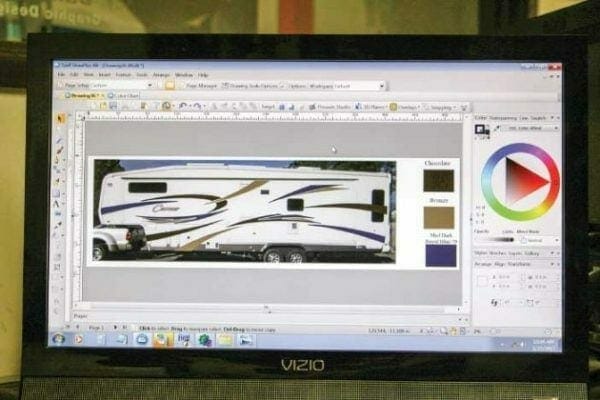
A digital photo of the trailer’s side wall was taken with a camera and downloaded to VIP Enterprises’ special computer-graphics program. This is done to generate a pattern for the new vinyl graphics.

Given the opportunity to replace the graphics and renew the exterior appearance of an otherwise fine RV is certainly a good investment, and that’s where RV Stripes, Graphics and More by VIP Enterprises of San Bernardino, California, comes in. It offers a one-stop shop for bringing an RV exterior back to life. Since 1993, the company has been perfecting the art of refreshing RVs with custom graphics, murals, paint, detailing, interior remodeling or a full renovation.

Since our 2011 fifth-wheel has been used for full-time service and exposed continually to the elements, the vinyl graphics were looking somewhat dingy. Consulting with VIP Enterprises, we decided to redo the exterior and chose an updated color theme. The company applied its advanced computer skills to design and color-match new graphics for rejuvenating the fifth-wheel’s exterior.

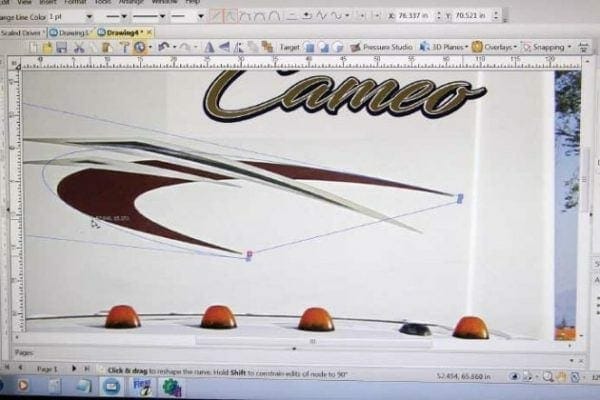
Close-up detail on the screen allows the operator to create a precise pattern. At this point, the customer can ask the designer to make changes to the pattern to suit his or her taste.

Once the design was finalized, it was time to strip off the old vinyl to make way for the new graphics. The task of removing and replacing the entire RV’s vinyl graphics seemed daunting, and, of course, it cannot be done without the proper tools, people power, and know-how. If you have the time, you can do it yourself to save some money, but you will need a few tools and a lot of elbow grease. More than likely, removing the old graphics yourself will probably take the better part of a week to complete.

A word of warning, in case you decide to take on the task of removal yourself: For VIP to computer-generated and cut vinyl replacement graphics, it will need extensive photos of each individual stripe and all the logos. This can be done by the owner, but be advised to consult the company first to ensure the desired results.

Those who elect to remove the old vinyl at home should research the process on the internet. Do-it-yourselfers will need plenty of razor blades, a heat gun, solvent and perhaps an electric grinder with a 3M specialty tool that is designed for removing stubborn vinyl pieces. One thing to keep in mind is how razor blades can easily damage the Filon siding; every small scratch or a gouge will show up under the new vinyl. After watching the techs at VIP work with all of these tools for removing the vinyl pieces, we knew we made the right decision to leave this job to the experts.


[siteorigin_widget class=”SiteOrigin_Widgets_ImageGrid_Widget”][/siteorigin_widget]
The technicians started with a razor blade and heat gun to remove some of the vinyl that wasn’t horribly sun-cracked. With patience and dexterity, they slowly pulled the vinyl from the Filon siding. The badly cracked pieces were removed with the 3M vinyl-removal tool, which was hard work, again validating the decision not to do it ourselves.

With the vinyl peeled off, the process of removing the glue started with a special solvent and the use of razor blades. VIP’s technique of spraying the solvent onto the old glue without it running everywhere was flawless, and expert handling of the razor blades left the surface clean and ready for the next process.

Should the Filon siding be oxidized and faded, the VIP people can polish the surface to a brilliant shine. Here the technicians used their priority blend of wax and cleaners, along with a special machine, to bring the finish back to life, looking nearly new again.

To print the replacement graphics, a technician with years of experience working with the selected colors and photographs that were uploaded to the computer previously, sizing the vinyl to cover the original stripes and logos. Superimposing the images of the fifth-wheel, it was possible to preview the revised exterior scheme and make any adjustments to the design. This process took roughly two hours to complete and was actually very exciting to watch.

From here, the procedure was highly exacting. A large roll of selected vinyl material is loaded into a cutting machine connected to the computer. Alignment is absolutely critical for the machine to cut each individual shape and size precisely. After triple-checking, the operator hits the enter button on the computer and watches the cutting machine like an eagle, making sure that it is feeding and cutting properly, and staying in alignment. One mistake will ruin an entire roll of vinyl. No pressure, right?

[siteorigin_widget class=”SiteOrigin_Widgets_ImageGrid_Widget”][/siteorigin_widget]
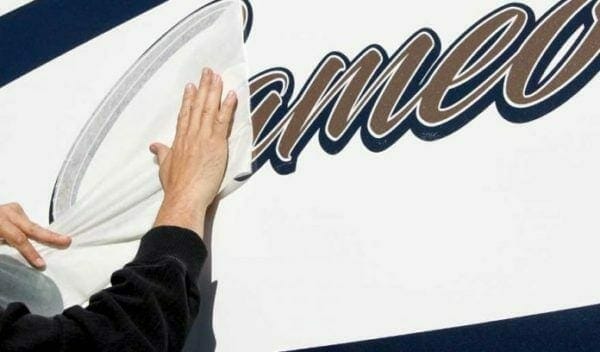
The next step has a curious name, “weeding and taping.” This is the process of adding a special paper that is laid over the top of the vinyl material for installation. Using a mixture of water and baby shampoo in a spray bottle, the vinyl pieces are positioned exactly where the removed graphics left shadows on all sides, including the front and rear of the RV. The installer must remove the backing and set the vinyl pieces precisely into their final resting places and make sure large air bubbles do not form under the vinyl.

The installer’s skill with the razor blade for cutting vinyl over and around obstacles was very impressive. The installation process took nearly two full days to complete. Of course, installation time will depend on the complexity of the vinyl graphics and the sheer size of the job.

The transformation was amazing. What was once a fifth-wheel that looked old before its time now boasted a showroom sparkle. It literally took years off the age of the trailer. VIP Enterprises uses high-quality materials backed by a five-year limited warranty that covers any defects in the vinyl. With a large selection of colors and styles to choose from, owners can use the existing design or create something more modern and completely change
the exterior look. VIP can even paint on new graphics for a longer-lasting look.

[siteorigin_widget class=”SiteOrigin_Widget_Image_Widget”][/siteorigin_widget]


Finished product: After five days, this

seven-year-old fifth-wheel looks brand- new again.

VIP Enterprises offers many services to inject new life into an RV.

A big benefit of this process is that VIP retains all of the RV’s vinyl shapes, logos and colors in its computer, and can generate a replacement piece that can be mailed to you or a repair shop, providing the color is still available from its suppliers.

Striping and replacing all the graphics on the aforementioned fifth-wheel was $3,400; buffing the Filon to a new look ran $600. Cost is dependent on the size and complexity of the job. The company will provide an accurate estimate upon visual inspection of the RV.

RV Stripes, Graphics and More by VIP Enterprises
909-376-0395 | www.travellitecampers.com

error: Content is protected !!

Pkg. download step by step