UPGRADES AND MODS

This is a list of the upgrades and mods that I have done. 

1. Changed out all the faucets even the outside shower. 
2. Went to 17.5 tires from 16. 
3. Changed all exterior lights to LEDs. 
4. Made shade covers for all windows that snap on. 
5. Added 3 led lights to kitchen area. 
6. Added led lights to pantry 
7. Changes 7 way cord to curly cord. 
8. Changed out Thetford toilet with Dometic 320. 
9. Added built in adjustable water regulator. 
10. Upgraded water filter to one that is easier to find and less expensive. 
11. Increased storage area of basement. 
12. Added water leak alarms to basement area. 
13. Added light to ceiling fan. 
14. Upgraded drum brakes to disc brakes. 
15. Added turbo wash to gray water tank. 
16. Added extra backup lights. 
17. Add hitch and cargo rack with lights to rear. 
18. Removed all silicone caulk from exterior and replaced with Lexel caulk. 
19. Replaced all cornice with valance curtains. 
20. Replaced wall sconces. 
21. Added 3 baskets in kitchen. 
22. Replaced heater air intake grate. 
23. Replaced RV mattress with sleep number. 
24. Replaced NOrCOLD with residential refrigerator. 
25. Added 110v outlet to kitchen area. 
26. Wet bolt kit. 
27. Axle shocks. 
28. Undercoated frame. 
29. Installed RO water filter. 
30. Changed vent cap to rotating vent. 
31. Replaced shower skylight with vent.

Comments & Replys

Alloy: That’ a good list of projects but I suspect the list isn’t finished yet

rvinsant: I like to tinker a little.

jlsr: WOW!!! You have been busy busy! I’m working on #18 now and #19 is ongoing for me but I am recovering the cornices with a brighter updated fabric. Why they thought they needed to put 10,000 staples on each valance I’ll never know !! 
#2 is on hubby’s list for next month …

Would love to see pics 
Acceptable, or an Issue?

ACCEPTABLE OR AN ISSUE?

CATEGORY:   FRAME & SUSPENSION COMPONENTS & TIRES

TOPIC:   Acceptable or an Issue?
Posted: Dec 31, 2018

See Forum Post HERE

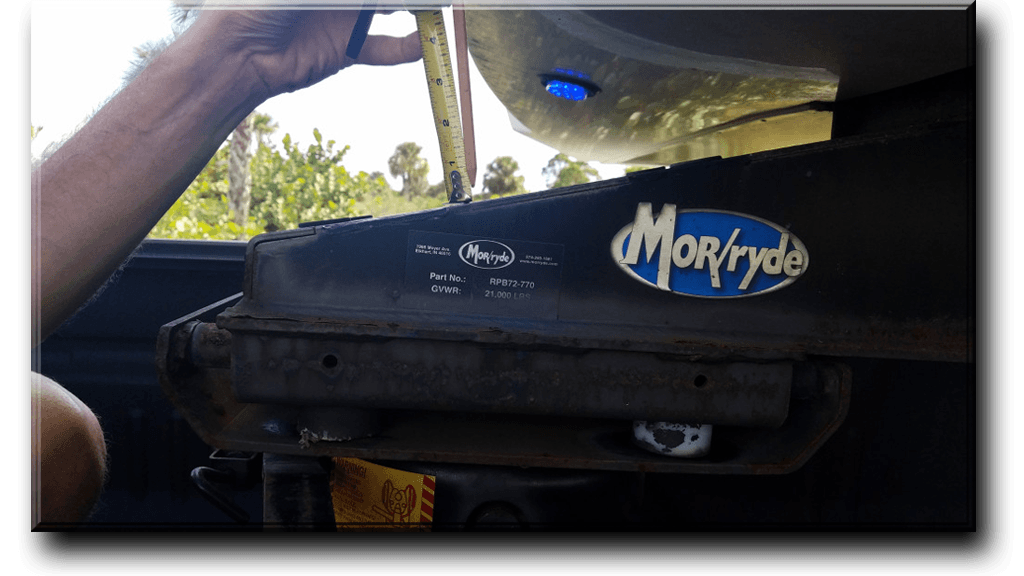
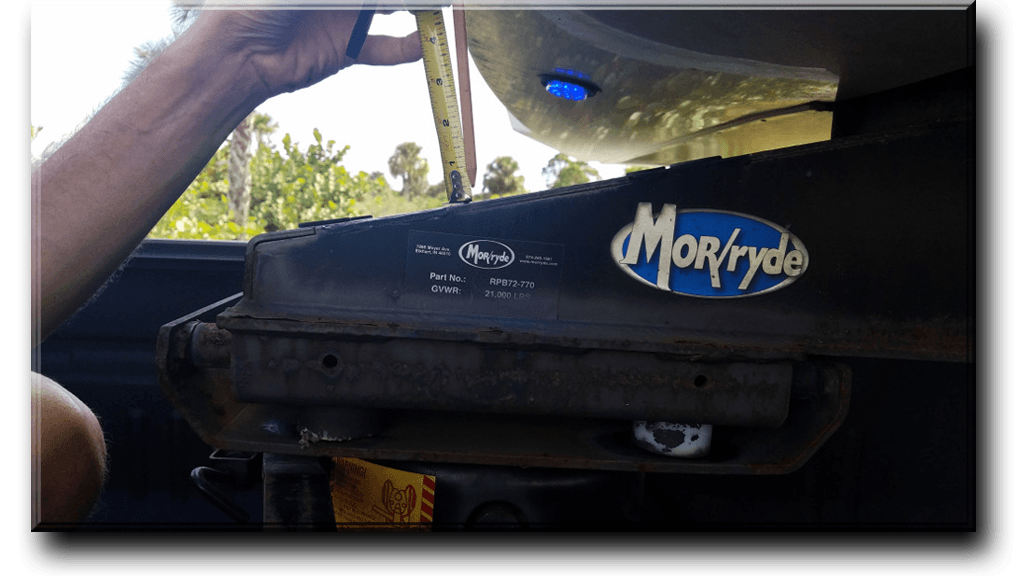
We’re having an absolutely great time at Jonathan Dickinson State Park – FL.  We had to move sites and in the process (as part of my obsessiveness!) I decided to see if there is pin box/frame flex when loading onto the hitch. I was a bit surprised, however, I have no idea what is considered acceptable or normal. I’ve enclosed 2 pix.  Not exact but you can get an idea.  I see a very minimal amount of movement on the side between the bedroom slide out and chin.  No stress cracks or caulk separating around the chin. There is no cracking or popping when loading either beyond what probably normal.  Nothing binding or loud or sudden.  I’d appreciate input from our experienced members. 


Just arrived back home.  Great trip!!
An additional thing I did prior to taking the weight off the truck was to check sliding closet doors.  Unhitched from the truck, both the doors slide back and forth freely.  Hitched up to the truck, the clearance at the bottom of the doors at the center guide is tighter and they do not slide as easily. 
So it apparent that the pin box frame area is weak enough to be pushing up on the bottom of the floor. I’d be curious if anyone else has ever taken notice of the sliding doors at the bottom center guide to see if there is any change loaded onto the hitch compared to unloaded.  The above post, as well as this, makes think I have some frame issues in the pin box area.  Again, there is a sign on the exterior walls, chin area, or separating caulk to indicate a problem otherwise. Next would be who in the heck in my area to trust it to check and/or repair.  
Thanks!   Phil

READ MORE

KITCHEN BACKSPLASH RE-DO

KITCHEN BACKSPLASH RE-DO

CATEGORY:  ON THE OUTSIDE

TOPIC:   Kitchen Backsplash Redo
Posted: 7:21 AM – Nov 05, 2018 #1
Posted By:  jlsr

See Forum Post HERE

Hi, 
I have been on a quest to brighten up the interior of our Lifestyle. The brown wood walls are overwhelming and make it look so dark inside. 
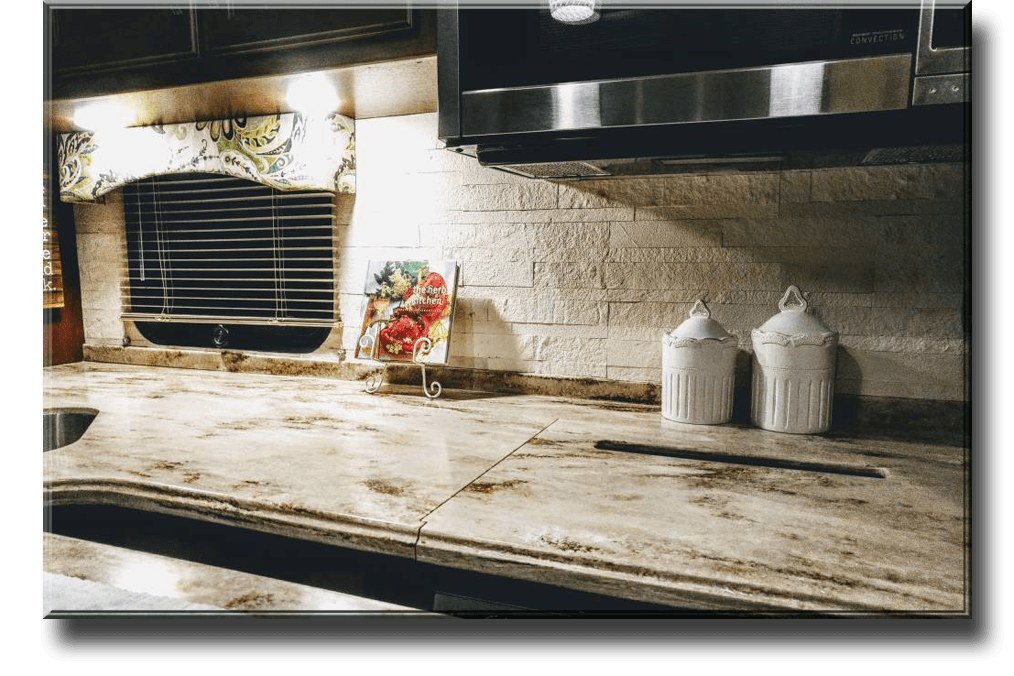
A couple weeks ago I ordered some off-white marble stone backsplash and put it up over the weekend. It has made a huge difference!  
Getting the rectangle of Corian off the wall was a challenge. They really didn’t want that to fall down when traveling I guess. Took me a while but got it off. It is heavy too! 
I used Aspect peel and stick real stone veneer tiles. Total weight of the full backsplash is about 6 lbs. The Corian thing is much heavier. 
I did use Loctite PL premium on corners and center of each tile as recommended by the manufacturer. I still have to apply the sealer. 
I’m very happy with the results. 

I recovered the brown valance too.


CLICK ON IMAGES TO ENLARGE IN LIGHTBOX

[wonderplugin_3dcarousel id=3]

COMMENTS AS OF 11/09/2018

moo2613 – Looks great!!  Very professional.

subframe – How did you get the Corian off? I’m thinking about doing something different in the kitchen area myself.. Thanks, Rich

jlsr – I used a long bread knife and kept working it back n forth until the glue let go. I was afraid I would wreck the wall if I pried it off. There was a LOT of glue on the back of it. Luckily the glue stayed attached to the Corian and did separate from the wall without gouging it. 

moo2613 – If you can get some monofilament fishing line behind it, just pull it back and forth like a saw and it will cut through it likity split.

ACoch – Looks great you did a wonderful job. I just have one question, why did you not do the wall to the right of the stove? My wife wants me to do this, but also do the wall to the right so when she cooks bacon or something that splatters it, does not get on the wall and is hard to clean. She puts up aluminum foil now.

jlsr – Well .. I didn’t have quite enough tiles to do that and then the bathroom too and I would have to move my spice tins ;-)

Dougsgang – This backsplash is awesome! Great job!! 

letsrun100 – JLSR, if you do the bathroom, please add pics to the thread we started re: updating the bathroom border. I’ve been watching your thread for ideas, too. Thanks!
Sue and Jim (letsrun100)

jlsr – I sure will, thanks

error: Content is protected !!

Pkg. download step by step